CUNNINGHAM’S INTRO TO INCENSE
—————————————————————————-
INCENSE HAS SMOLDERED on magicians’ altars for at least 5,000 years. It was burned in antiquity to mask the odors of sacrificial animals, to carry prayers
to the Gods, and to create a pleasing environment for humans to meet with Deity.
Today, when the age of animal sacrifices among most Western magicians is long
past, the reasons for incense use are varied. It is burned during magic to
promote ritual consciousness, the state of mind necessary to rouse and direct
personal energy. This is also achieved through the use of magical tools, by
standing before the candle-bewitched altar, and by intoning chants and symbolic
words.
When burned prior to magical workings, fragrant smoke also purifies the altar
and the surrounding area of negative, disturbing vibrations. Though such a
purification isn’t usually necessary, it, once again, helps create the
appropriate mental state necessary for the successful practice of magic.
Specially formulated incenses are burned to attract specific energies to the
magician and to aid her or him in charging personal power with the ritual’s
goal, eventually creating the necessary change.
Incense, in common with all things, possesses specific vibrations. The magician
chooses the incense for magical use with these vibrations in mind. If performing
a healing ritual, she or he burns a mixture composed of herbs that promote
healing. When the incense is smoldered in a ritual setting it undergoes a
transformation. The vibrations, no longer trapped in their physical form, are
released into the environment. Their energies, mixing with those of the
magician, speed out to effect the changes necessary to the manifestation of the
magical goal.
Not all incense formulas included in this book are strictly for magical use.
Some are smoldered in thanks or offering to various aspects of Deity, just as
juniper was burned to Inanna 5,000 years ago in Sumer. Other blends are designed to enhance Wiccan rituals.
You needn’t limit incense use to ritual, but avoid burning healing incense just
for the smell, or to freshen up your stale house. Burning magically constructed
and empowered incenses when they’re not needed is a waste of energy. If you
wish to burn a pleasant-smelling incense, compound a household mixture for this purpose.
THE TWO FORMS OF INCENSE
—————————————————————————-
Incense is virtually a necessity in magical practice, but there seems to be a
great mystery surrounding its composition. Fortunately with practice, it’s
surprisingly easy to make incense.
Two types of incense are used in magic: the combustible and the non-combustible.The former contains potassium nitrate (saltpeter) to aid in burning, while the latter does not. Therefore combustible incense can be burned in the form of bricks, cones, sticks and other shapes, whereas non-combustible incense must be sprinkled onto glowing charcoal blocks to release its fragrance.
Ninety-five percent of the incense used in magic is the non-combustible, raw or
granular type. Why? Perhaps because it’s easier to make. Herbal magicians are
notoriously practical people.
Also, some spells (particularly divinatory or evocational rites; see the
Glossary for unfamiliar words) call for billowing clouds of smoke. Since cone,
stick and block incense burn at steady rates, such effects are impossible with
their use.
The advantages of combustible incense can outweigh its drawbacks, depending on circumstance. Need to burn some money drawing incense for an unexpected ritual? You could take out the censer, a charcoal block and the incense, light the
charcoal, place it in the censer and sprinkle incense onto it. Or you could pull
out a cone of money-drawing incense, light it, set it in the censer and get on
with your ritual.
Different magicians prefer different types of incense. I’m partial to raw or
non-combustible incenses, but the wise magical herbalist stocks both types.
Hence, instructions for the preparation of both forms appear here.
NON-COMBUSTIBLE INCENSE
—————————————————————————-
Be sure you have all necessary ingredients.
Each ingredient must be finely ground, preferably to a powder, using either a
mortar and pestle or an electric grinder. Some resins won’t powder easily, but
with practice you’ll find the right touch. When I first worked with herbs I
couldn’t powder frankincense. It kept on gumming to the sides of the mortar and
to the tip of the pestle. After a while I stopped fighting it (and cursing it,
I’ll admit-not a good thing to do with herbs used in incenses) and got into the
flow of the work. The frankincense came out just fine.
When all is ready, fix your mind on the incense’s goal-protection, love, health.
In a large wooden or ceramic bowl, mix the resins and gums together with your
hands. While mingling these fragrant substances, also mix their energies.
Visualize your personal power-vibrating with your magical goal-exiting your
hands and entering the incense. It is this that makes homemade incense more
effective than its commercial counterparts.
Next, mix in all the powdered leaves, barks, flowers and roots. As you mix,
continue to visualize or concentrate on the incense’s goal.
Now add any oils or liquids (wine, honey, etc.) that are included in the recipe.
Just a few drops are usually sufficient. On the subject of oils: If there’s a
sufficient amount of dry ingredients in the recipe, you can substitute an oil
for an herb you lack. Simply ensure that the oil an essential oil, for
synthetics smell like burning plastic when smoldered.
Once all has been thoroughly mixed, add any powdered gem-stones or other power boosters. A few-not many-of the recipes in this book call for a pinch of
powdered stone.
To produce this, simply take a small stone of the required type and pound it in
a metal mortar and pestle (or simply smash it with a hammer against a hard
surface). Grind the resulting pieces into a powder and add no more than the
scantiest pinch to the incense.
One general power-boosting “stone” is amber. A pinch of this fossilized resin
added to any mixture will increase its effectiveness, but this can be rather
expensive.
The incense is now fully compounded. Empower the incense and it is done. Store
in a tightly capped jar. Label carefully, including the name of the incense and
date of composition. It is ready for use when needed.
COMBUSTIBLE INCENSE
——————————————————————————–
Combustible incense (in the form of cones, blocks and sticks) is fairly complex
in its composition, but many feel the results are worth the extra work.
To be blunt, this aspect of incense composition isn’t easy. Some of the
ingredients are difficult to obtain, the procedure tends to be messy and
frustrating, and some even question whether combustible incense is as magically
effective as its non-combustible counterpart. For years I hesitated making or
using sticks, cones or blocks because they contain potassium nitrate. This
substance is magically related to Mars, and I felt this might add unneeded
aggressive energies to the I incense.
But when I considered that the charcoal blocks I use to burn I non-combustible
incense also contain saltpeter, I relented and experimented. However, to this
day I prefer the raw form. To each their I own.
At first, making combustible incense may seem impossible to accomplish. But
persevere and you’ll be rewarded with the satisfaction of lighting incense cones
you’ve made yourself.
Gum tragacanth glue or mucilage is the basic ingredient of all molded incenses.
Gum tragacanth is available at some herb stores; at one time in the past every
drugstore carried it. It is rather expensive ($3.00 an ounce as of this
writing), but a little will last for months.
To make tragacanth glue, place a teaspoon of the ground herb in a glass of warm
water. Mix thoroughly until all particles are dispersed. To facilitate this,
place in a bowl and whisk or beat with an egg beater. This will cause foam to
rise, but it can be easily skimmed off or allowed to disperse. The gum
tragacanth has enormous absorption qualities; an ounce will absorb up to one
gallon of water in a week.
Let the tragacanth absorb the water until it becomes a thick bitter-smelling
paste. The consistency of the mixture depends on the form of incense desired.
For sticks (the most difficult kind to r make) the mixture should be relatively
thin. For blocks and cones a thicker mucilage should be made. This is where
practice comes in handy after a session or two you will automatically know when
the mucilage is at the correct consistency.
If you can’t find tragacanth, try using gum arabic in its place. This, too,
absorbs water. I haven’t tried using it for incense yet, but all reports say it
works as well as tragacanth.
When you have made the trag glue, cover with a wet cloth and set aside. It will
continue to thicken as it sits, so if it becomes to thick add a bit of water and
stir thoroughly.
Next, make up the incense base. Not all formulas in this hook can be used for
combustible incense; in fact, most of them were designed to be used as non-
combustible incenses. Fortunately, by adding the incense to a base it should
work well. Here’s one standard formula for an incense base:
CONE INCENSE BASE
——————————————————————————–
* 6 parts ground Charcoal (not self-igniting)
* 1 part ground Benzoin
* 2 parts ground Sandalwood
* 1 part ground Orris root (this “fixes” the scent)
* 6 drops essential oil (use the oil form of one of the ingredients in the
incense)
* 2 to 4 parts mixed, empowered incense
Mix the first four ingredients until all are well blended. Add the drops of
essential oil and mix again with your hands. The goal is to create a powdered
mixture with a fine texture. If you wish, run the mixture through a grinder or
the mortar again until it is satisfactory.
Add two to four parts of the completed and empowered incense mixture (created
according to the instructions for Non-combustible Incense above). Combine this
well with your hands.
Then using a small kitchen scale, weigh the completed incense and add ten
percent potassium nitrate. If you’ve made ten ounces of incense, add one ounce
potassium nitrate. Mix this until the white powder is thoroughly blended.
Saltpeter should constitute no more than ten percent of the completed bulk of
the incense. If any more is added, it will burn too fast; less and it might not
burn at all.
Potassium nitrate isn’t difficult to obtain. I buy mine at drug stores, so check
these (it isn’t usually on the shelf; ask for it at the pharmacy). If you have
no luck, try chemical supply stores.
Next, add the tragacanth glue. Do this a teaspoon at a time, mixing with your
hands in a large bowl until all ingredients are wetted. For cone incense you’ll
need a very stiff, dough-like texture. If it is too thick it won’t properly form
into cones and will take forever to dry. The mixture should mold easily and hold
its shape.
On a piece of waxed paper, shape the mixture into basic cone shapes’ exactly
like the ones you’ve probably bought. If this form isn’t used, the incense might
not properly burn.
When you’ve made up your cone incense, let it dry for two to seven days in a
warm place. Your incense is finished.
For block incense make a 1/3 inch-thick square of the stiff dough on waxed
paper. Cut with a knife into one-inch cubes as if you were cutting small
brownies. Separately slightly and let dry.
Stick incense can be attempted as well. Add more tragacanth glue to the mixed
incense and base until the mixture is wet but still rather thick. The trick here
is in determining the proper thickness of the incense/tragacanth mixture and in
finding appropriate materials to use. Professional incense manufacturers use
thin bamboo splints, which aren’t available. So try homemade wooden or bamboo
splints, broom straws, very thin twigs, or those long wooden cocktail skewers
that are available at some grocery and oriental food stores.
Dip the sticks into the mixture, let them sit upright and then dip again.
Several dippings are usually necessary, this is a most difficult process.
When the sticks have accumulated a sufficient amount of the incense, poke them
into a slab of clay or some other substance so that they stand upright. Allow
them to dry.
One variation on stick incense making uses a stiffer incense dough. Pat down the
dough on waxed paper until it is very thin. Place the stick on the dough. Roll a
thin coating of dough around the stick. The incense shouldn’t be more than twice
the thickness of the stick. Squeeze or press it onto the stick so that it will
stay put, let dry.
Personally, I find the inclusion of charcoal in this recipe to be distasteful
and unnecessary. It makes it imperative that you wash your hands numerous times throughout this process. Although traditional, charcoal also lends a peculiar odor to the incense. So here’s another recipe I’ve used with good results:
CONE INCENSE BASE #2
* 6 parts powdered Sandalwood (or Cedar, Pine, Juniper)
* 2 parts powdered Benzoin (or Frankincense, Myrrh, etc.)
* l part ground Orris root
* 6 drops essential oil (use the oil form of one of the incense ingredients)
* 3 to 5 parts empowered incense mixture
In this recipe, powdered wood is used in place of the charcoal. Use sandalwood
if it’s included in the incense recipe. If not, use cedar, pine or juniper,
depending on the type of incense to be made. Try to match the wood base of this
incense to the incense’s recipe. If you can’t, simply use sandalwood.
Mix the first three ingredients until combined. Add the oil and mix again. Then
add three to five parts of the completed incense to this. Again, this should be
a powder. Weigh and add ten percent potassium nitrate.
Mix, add the gum tragacanth glue, combine again and mold in the methods
described above.
RULES OF COMBUSTIBLE INCENSE COMPOSITION
—————————————————————————-
Here are some guidelines to follow when compounding combustible incense. These are for use with the Cone Incense Base #2 recipe above. If they aren’t followed, the incense won’t properly burn. There’s less room for experimentation here than with non-combustible incenses.
* First off, never use more than ten percent saltpeter. Ever!
* Also, keep woods (such as sandalwood, wood aloe, cedar, juniper and pine) and
gum resins (frankincense, myrrh, benzoin, copal) in the proper proportions: at
least twice as much powdered wood as resins. If there’s more resinous matter,
the mixture won’t burn.
* Naturally, depending on the type of incense you’re adding to the base, you may
have to juggle some proportions accordingly. Simply ensure that frankincense and its kin never constitute more than one-third of the final mixture, and all
should be well.
* Though this hasn’t covered all aspects of combustible incense making (that
could be a book in itself), it should provide you with enough guidelines to make
your own. Experiment, but keep these rules in mind.
INCENSE PAPERS
—————————————————————————-
Incense papers are a delightful variation of combustible incense. Here, rather
than using charcoal and gum tragacanth, tinctures and paper are the basic
ingredients. When finished you’ll have produced several strips of richly
scented paper that can be smoldered with a minimum of fuss.
To make incense papers, take a piece of white blotter paper and cut it into six-
inch strips about an inch wide.
Next, add one and one-half teaspoons potassium nitrate to one half cup very warm water. Stir until the saltpeter is completely dissolved.
Soak the paper strips in the saltpeter solution until thoroughly saturated. Hang
them up to dry.
You now have paper versions of the charcoal blocks used to burn incense. The
obstacle in scenting them is to overcome the normal smell of burning paper. For
this reason, heavy fragrances should be used, such as tinctures.
Tinctures compounded from gums and resins seem to produce the best results. I’ve tried using true essential oils with incense papers but without much success.
Empower the tincture(s) with your magical need, then pour a few drops of the
tincture onto one strip of paper. Smear this over the paper and add more drops
until it is completely coated on one side.
Hang the strip up to dry and store in labeled, airtight containers until needed.
To speed drying, turn on the oven to a low temperature, leave the door open, and
place the soaked incense papers on the rack. Remove them when dry.
Generally speaking, incense papers should be made with one tincture rather than
mixtures. But, once again, try various formulas until you come up with positive
results.
To use incense papers, simply remove one paper and hold it above your censer.
Light one tip with a match, and after it is completely involved in flame,
quickly blow it out. Place the glowing paper in your censer and let it smolder,
visualizing or working your magical ritual.
Incense papers should burn slowly and emit a pleasant scent, but again your
results will vary according to the strength of the tincture and the type of
paper used.
Plain unscented incense papers can be used in place of charcoal blocks. For this
purpose soak the papers in the potassium nitrate solution and let dry, then set
one alight in the censer. Sprinkle a thin layer of the incense over the paper.
As it burns the paper will also smolder your incense.
You may have difficulty in keeping incense paper lit. The secret here is to
allow air to circulate below the papers. You can ensure this by either placing
the paper on some heat-proof object in the censer, or by filling the censer with
salt or sand and thrusting one end of the paper into this, much as you might
with incense sticks. The paper should burn all the way to its end.
Incense papers are a simple and enjoyable alternative to normal combustible
incense. Try them!
USING INCENSE
——————————————————————————
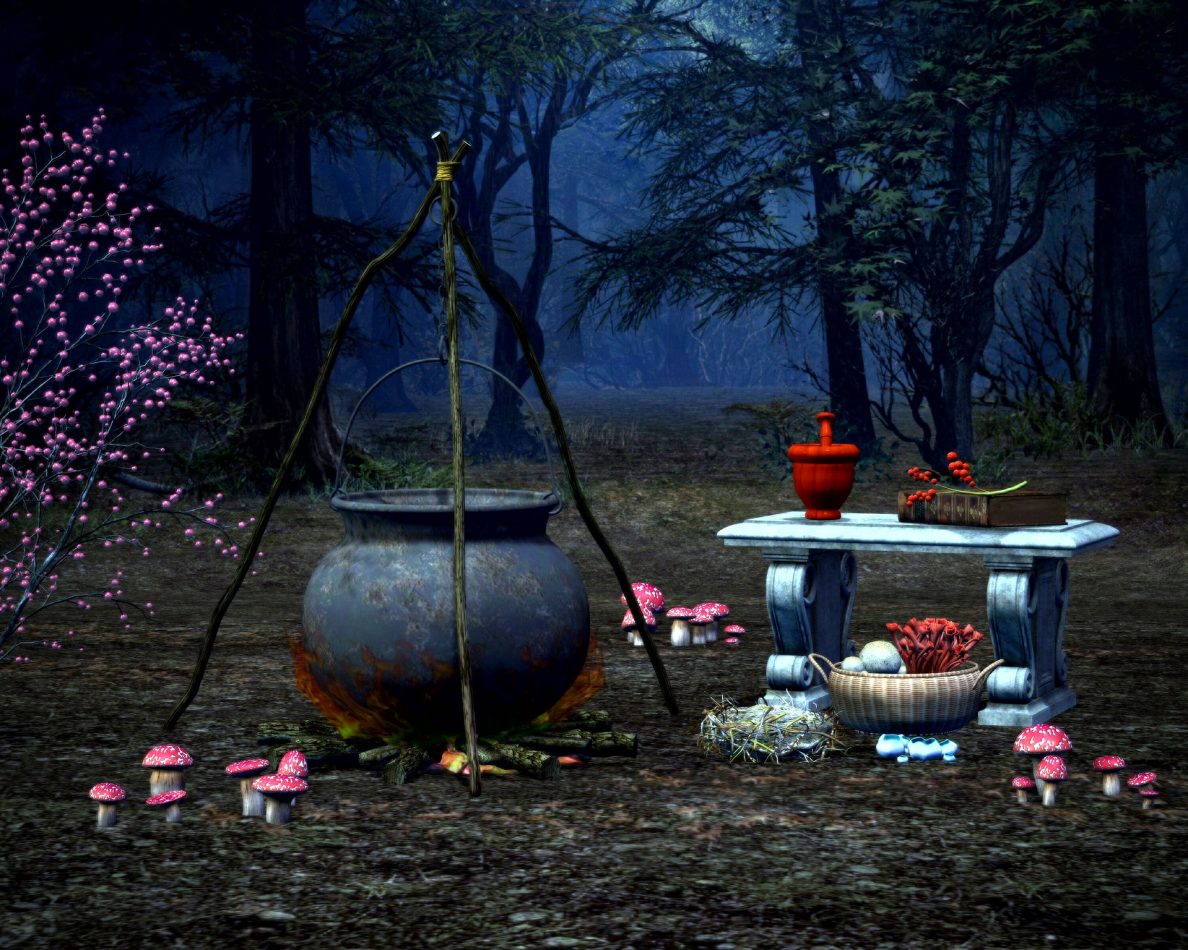
THE CENSER
Whether you use raw incense, blocks or incense papers, you’ll need an incense
burner. The censer can be anything from a gilt, chain equipped, church-type
affair to a bowl of sand or salt. It truly doesn’t matter. I know occultists
who’ve used the bowl-and-salt method for years, long after they could have
afforded to purchase other censers.
Although I have several, perhaps my favorite censer is actually a mortar from
Mexico. It is carved from lava, stands on three legs and is perfect for use as a
censer.
Your own taste should determine which censer is right for you. If nothing else
is available, use a bowl half-filled with sand or salt and get on with it The
sand protects the bowl and the surface on which it sits against heat. It also
provides a handy place on which to prop up stick incense.
USING COMBUSTIBLE INCENSE
Simply light it, blow out the flame after the tip is glowing, and set it in the
censer. As it burns visualize your magical goal manifesting in your life. It’s
that simple. You may wish to also burn candles of the appropriate color, perhaps
anointed with a scented oil that is also aligned with your goal.
Naturally, incense may also be smoldered as a part of a larger ritual.
USING NON-COMBUSTIBLE INCENSE
Light a self-igniting charcoal block (see below) and place it in a censer. Once
the block is glowing and saltpeter within it has stopped sparkling, sprinkle a
half-teaspoon or so of the incense on the block. Use a small spoon if you wish.
It will immediately begin to burn, and in doing so, release fragrant smoke.*
Remember: Use just a small amount of incense at first. When the smoke begins to
thin out, add more. If you dump on a spoonful of incense it will probably
extinguish the charcoal block, so use small amounts. Incenses containing large
amounts of resins and gums (frankincense, myrrh and so on) burn longer than
those mainly composed of woods and leaves.
Don’t knock off the ash that forms on top of the charcoal unless the incense
starts to smell foul. In such a case, scrape off the burning incense and the ash
with a spoon and add a fresh batch. Frankincense does tend to smell odd after
smoldering for some time.
Incense can be burned as part of a magical ritual, to honor higher forces, or as
a direct act of magic, such as to clear a house of negativity and to smooth
peaceful vibrations throughout it.
* There’s a difference between burning and smoldering; though I use such terms
as “burn this incense” several times, I really mean “smolder.”
CHARCOAL BLOCKS
These are necessities for burning non-combustible incense. They’re available in
a wide range of sizes, from over an inch in diameter (they’re usually round) to
about a half-inch size. Most religious and occult supply stores stock them, and
they can be obtained from mail-order suppliers.
Potassium nitrate is added to these charcoal blocks during their manufacture to
help them ignite. When touched with a lit match, fresh charcoal blocks erupt
into a sparkling fire which quickly spreads across the block. If you wish, hold
the block. It may light easily. If so, quickly place it in the censer to avoid
burning your fingers. Or, light the block in the censer itself, thereby
preventing burns. This is some what harder to do.
Unfortunately, some charcoal blocks aren’t fresh, have been exposed to moisture, or haven’t been properly saturated with the potassium nitrate solution and so don’t light well. If this is the case re-light the block until it is evenly
glowing and red. Then pour on the incense.


You must be logged in to post a comment.